How to Create an NFT Contract (without Coding Skills)
How to Create an NFT Contract (without Coding Skills)
Mint your own NFTs on any Ethereum compatible chain such as the Mainnet, Polygon, xDai, etc

NFTs are the new superstars of blockchain. An NFT can represent a picture (or any piece of art), an object in the virtual or the real world, or any other non-fungible thing.
In this article, I’ll show you, how you can create your very own NFT contract, and mint your own NFTs on any Ethereum compatible chain such as the Mainnet, Polygon, xDai, etc.
OpenZeppelin is a smart contract framework with many smart contract templates and libraries. Something like a swiss army knife for smart contract developers. It also has an online wizard that allows you to create simple smart contracts within a minute. Let’s see, how can we create an NFT contract with it.
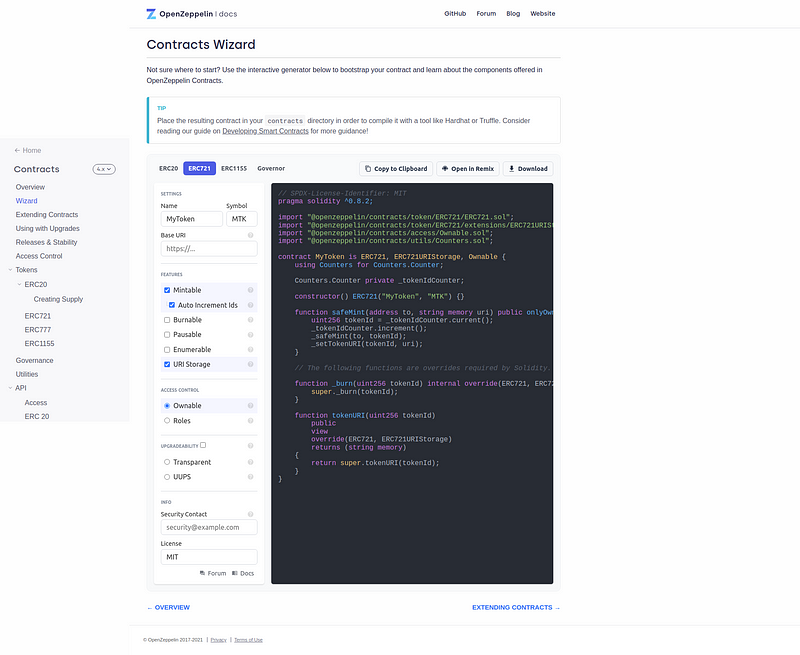
ERC721 is the NFT standard, so choose it on the tab bar, then check Mintable, Autoincrement Ids, and URI storage. You will see the autogenerated code on the right side. On the Settings block, you can set your token name and symbol. From these few steps, you’ve configured a fully functional NFT contract. Deploying it to the blockchain is just as easy.
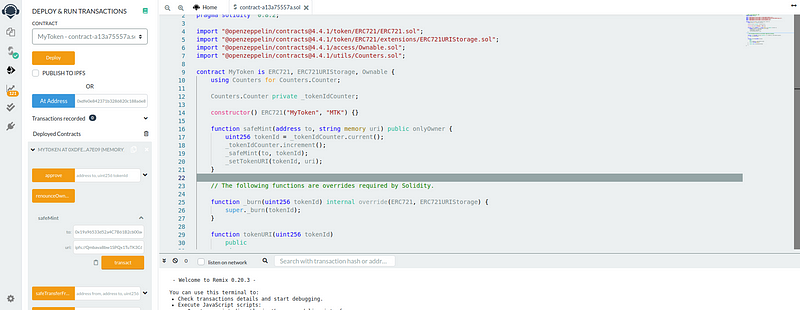
Click on the Open in Remix button that will open a new page for you with Remix. The first step is compiling the contract that you can do with the 2nd menu item (Solidity compiler).
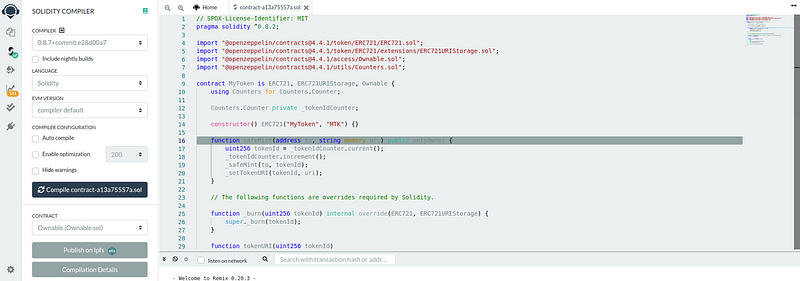
Compile contract by using the Compile contract button, and choose the 3rd menu item (Deploy and run transactions) for deploying the contract.
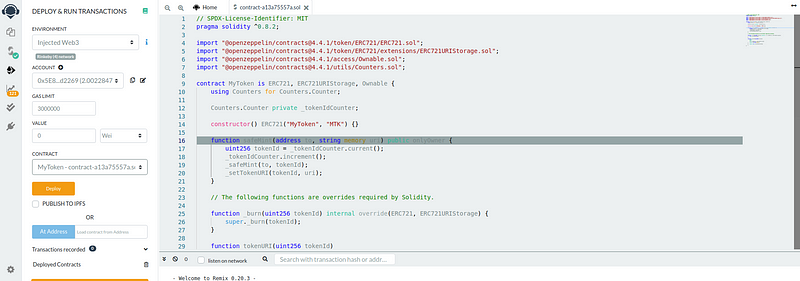
On this page, choose the Injected web3 environment to connect Metamask to Remix, choose the token contract, and push the Deploy button. If everything goes well, Metamask will pop up a Confirm dialog. Confirm the transaction, wait for a little for the miners, and… done. Congratulations, you have your own deployed NFT contract!
You will see your deployed contract on the bottom of the left side. If you move your mouse pointer over the token name, you can copy its contract address. Write it down somewhere, because it will be important later.
Let’s mint our first NFT with our brand new token contract! When you mint an NFT, you have to give a URI that points to the NFT metadata. This metadata describes what the NFT represents. Technically this metadata is a simple JSON file. The basic format of the JSON file is defined in ERC-721 but it is freely extendable. The basic fields are name, description, and image, so the JSON file looks like this:
{
  "name": "Sample token",
  "description": "This is my first token",
  "image": “...image url..”
}
The standard doesn’t define where the metadata should be placed, but immutable storage, like IPFS is ideal storage for the NFT metadata. Pinata is a simple service for uploading your NFT data and publishing it to IPFS. It has a free plan that gives 1Gb storage which is more than enough for us, so choose your favorite image and upload it to Pinata.
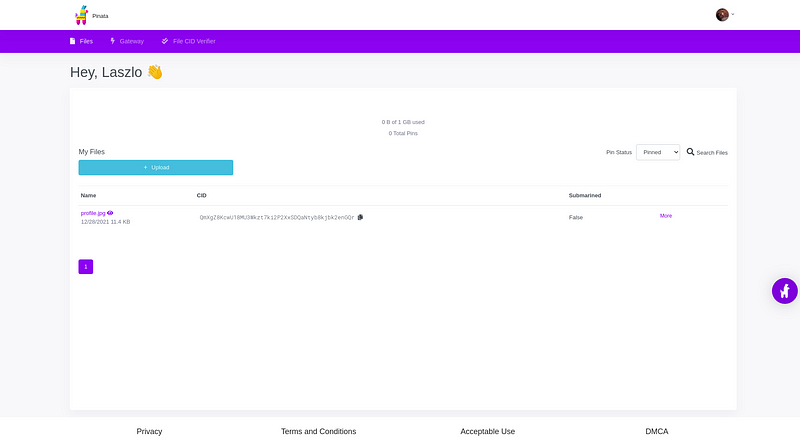
After the upload, you will see the generated CID of the image. This is the unique identifier of it on the IPFS. You can check your file through the public IPFS gateway on the https://ipfs.io/ipfs/{cid} URL.
Now we have the image CID, so we can easily create the metadata JSON. My JSON looks like this:
{
  "name": "Sample token",
  "description": "This is my first token",
  "image": "ipfs://QmXgZ8KcwU18MU3Wkzt7ki2P2XxSDQaNtyb8kjbk2enGQr"
}
We can go back with the metadata JSON CID to Remix and mint our first NFT token. To do this, open the token contract on the bottom of the left side and open safeMint. The safeMint function has two parameters. The Ethereum address of the NFT owner (must be different than the contract creator) and the metadata URI. The URI will be ipfs://{CID of the metadataJSON}.
Push the transact button, confirm the transaction in MetaMask, and voila you’ve minted a new NFT token that you can check on OpenSea. OpenSea is an NFT marketplace where you can sell or buy NFTs on many Ethereum compatible chains.
The URL of your token on OpenSea is https://opensea.io/assets/{contract address}/{NFT id}. OpenSea has a test interface that you can use for showing NFTs from a testnet. I created my NFT contract on Rinkeby so I will use this alternative URL where the host part is testnets.opensea.io.
My current URL is https://testnets.opensea.io/assets/0xdfe0e842371b3286820c188a6e855fd7f1da7e09/0 because my token contract address is 0xdfe0e842371b3286820c188a6e855fd7f1da7e09 and the first NFT’s index is 0.
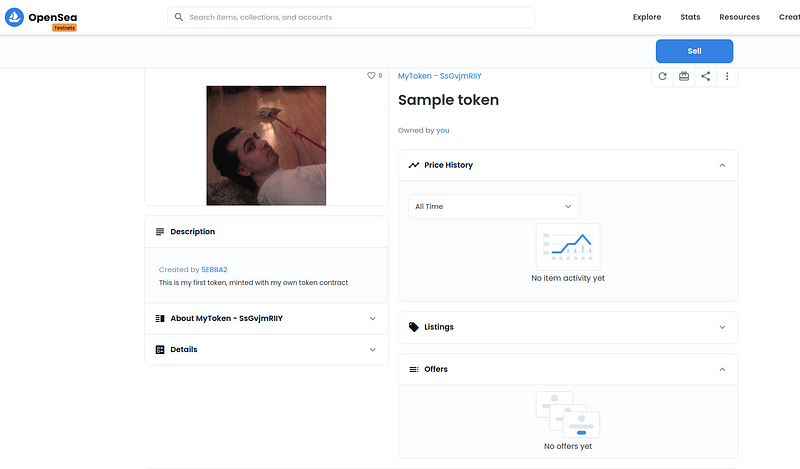
You can see the name from the meta on the right side, and the image with the description on the left side. This NFT is fully functional. I could sell it or do anything that I can do with any other NFT.
As you can see, creating NFT contracts and minting NFTs are super simple with great tools like OpenZeppelin, Remix, or MetaMask. Even if you don’t have any programming experience.
Have fun and make NFTs.
This article was originally published here.